Monday, October 28, 2013

Challenge #72-"Color Challenge: Yellow and Purple"

Let's do something a little different for this challenge.  It is a color challenge--Yellow and Purple.  You can make any project  you wish as long as the dominant colors are yellow and purple.  The Design Team has created a few projects using two images from Jelly Park Digitals, my sponsor.
Vicki
I used this cute vase of flowers for my card's image.  It is colored with Copic markers and then was cut with a Spellbinder die.  Embellishments include three rows of yellow ribbon and a small arrangement of artificial flowers.


Krisha
The sponsor for this challenge is Jelly Park Designs and the colors are, of course, purple and yellow! 
For this first week I chose this pretty little flower arrangement and sentiment, and used water colors to color it in.  It is mounted on a dark purple (which never scans right) and then onto a white card base.  I went around the edges of the card with a yellow Gelato and added a stacked Tattered flower and leaf to the corner, with a purple pearl in the center.
 
Michele
I love purple and yellow and those are also two opposite colors on the color wheel so they make for a great color challenge.  I colored the Jelly Park Digitals flowers with mostly purple and yellow colored pencils. T Then I made a simple composition with yellow cardstock, unevenly cut purple striped designer papers and some butterflies.  Enjoy!
 
Hazel
I've used Jelly Park image 'witch master', colouring with spectrum noirs. Backing cards are Hunkydory and the strips on the left are offcuts of gelli plate prints. Sentiments generated on my dymo letratag.
Barbara
I coloured this cute little witch from Jelly Park Digitals purple layered her on purple and a bright yellow cardstock, My patterned paper is from a DCWV stack pad. I then added some tiny rickrack (yardsale purchase) and the yellow buttons.

 Rene
My little girl from Jellypark Digitals is all dressed up for Haloween. I kept her outfit bright using pencils to colour her. A Purple VersaMagic Dewdrop adds some extra colour to the background and card. Bright yellow ribbon and a purple button with gold thread carries the theme through.
Trick or treat?

Petra
This tag was designed around the lovely Autumn flower from my garden. For the background I was still in stencil mode with purple and yellow which is a brilliant colour combination. I finished the tag with some baker's twine, a half pearl and a stamped word.
Jelly Park Digitals is my sponsor for this challenge.  They have some very nice and inexpensive digital stamps  If you have a chance take a visit to their site by clicking on the button above.  I am sure you will find the perfect digital there.

Sunday, October 27, 2013

More for the Road

Since my challenge "Let's Stencil" is ending tonight,  I thought I would post another stencil piece this afternoon.  This uses almost all the acrylic colors I own.  I was just playing around and came up with this.

Saturday, October 26, 2013

Witches All Around

Here is another witch from the large assortment  of witches at the Lunagirl shop.  That is the current challenge on the Lunagirl Moonbeams website.  Drunken Stampers is also having a Goth or Halloween challenge this week.  Below is my take on Halloween for both groups.
 
I used stripped designer paper as my background and added a small block of checkered designer paper.  On the background is a cute little witch from Lunagirl.  To finish off the card a little fence from my stash and a pumpkin made from some ovals and distressed on the edges were added.

Thursday, October 24, 2013

A be"Witch"ing challenge

Lunagirl Moonbeams are a little on the be"witch"ing side this week as they have been creating projects  using some of the wonderful witch images from Lunagirl for the current challenge "Witchery".  These images would be good for any vintage Halloween card.

Below is a card I made using one of the great Lunagirl images.  The background was embossed with a folder and then highlighted with black ink.  I love the dimension that the embossing gives to the designer paper.  I cut out the image with a small border of white and distressed it a little with black ink.  The sentiment was a piece of cardstock from my stash.


Sunday, October 20, 2013

Stencil Challenge Continues!

We love seeing your stenciled creations and you have one more week to link your creation for this challenge. Our challenge sponsor is Stencilgirl Products.  Here are some creations from the design team to inspire you to join.
Vicki
This time I decided to make an art journal page using a number of stencils on my Gelli Plate.  I really like the way this turned out. 


Hazel
Background created by first dabbing scrunched paper on to acrylic paint on a gelli plate creating a mottled effect, then using two Clarity Stamp stencils to finish the background with different colours of acrylic. Stamps were inked with stazon black - the collage at the bottom is a Paper Artsy stamp, other stamps are My Mind's Eye.


Michele
A long time ago I got this "Day of the Dead" stencil.  Since we have our stencil challenge so close to November I decided to make my second piece with this stencil.  There is also a flower stencil in the background.  I had a lot of fun working with mixed media to make this creation is to honor those who have passed on.  Whatever theme you choose, I hope you will join our stencil challenge!


Krisha
I started with a postcard size of water color paper then water colors for this base of this, with black and white pens making the frame.  I used the stencil and distressed ink for the image and a sentiment from Inkadinkado. "Hello Fall!"


Barbara
I have had a couple of firsts doing this tag, I have never done a background with my distress inks and a spray bottle and I have never used a stencil. I didn't have any stencils I did go out and purchase one just to have one for the challenge, I worked with it for most of the afternoon and didn't like anything I did with it so I got out my Tim Holtz Flourishes sizzix die and  cut it out of a piece of a spellbinders plastic that I saved from one of the sets of dies. The flourish has a small and large one, I used the small on this one, twice with Silks acrylic glaze, Solar gold. I am going to have to practice with my larger stencil as I think I will be very nice when finished...practice makes perfect (or something close)Check out my blog for a close up of one of the flourishes.


Petra
I absolutely love this stencil, it is so versatile for creating backgrounds. It is an inky background and all background is misted with Perfect Pearls. The frame is cut with label dies, the boot stamped. Both are coloured with a mix of Copics and distress inks and covered with glossy accents and a little bit of sparkly stickles for the boot.

Please join us!

Saturday, October 19, 2013

Lunagirl Moonbeams are a Little Blue

Lunagirl Moonbeams are looking a little on the blue side this week as they have been creating projects with the theme "Lady Blue".  Drop over to Lunagirl and see what they have created and get"blue" before the challenge ends.  I am a little sad that this challenge is ending this weekend.

This is one of my pieces.. I hope have inspired you to enter.  It is such a fun challenge and Karen has some great collage sheets you can use for the challenge.
Of course, the digital is from Lunagirl and so is the designer paper behind her.  The trim above her head was made with a Martha Stewart punch.

Sunday, October 13, 2013

Challenge #71 - "Let's Stencil"

This challenge is a little different from what I usually post.  It is "Use a Stencil".  The DT does not care how the stencil was used.  It can be on a art journal page, a canvass, a card or even an ATC.  You are not limited is to how you use your stencil as long as we can tell that a stencil was used.
Vicki
I  used a piece of cardstock which had been used during a session of Gelli printing.  It basically was a piece on which I cleaned my brayer and brushes. The scan does show the reds and yellows in the paint.  I used a StencilGirl flower stencil at the top and a tree stencil at the bottom.  The flowers have a silver sheen to them and the trees are a dull grey. 

I decided to make a card with my cardstock and this is what I created.  The image is from Gecko Galz.  I really like the way the paint fades off in the corner. Hopefully, you can visualize the two children walking out of the scary woods on Halloween night. 

The remainder of the cardstock with the flowers will be used for another project.

Hazel
I used stencils with a gelli plate. First I made a print of yellow dabbing a scrunched up piece of paper on to the acrylic paint to give a mottled effect. I then used a lovely leafy stencil from Clarity Stamps to overlay and lightly stamped some trees in the background using an Inkadinkado stamp with memento rich cocoa. I randomly used Sheena Douglass stamps inked stazon black.
Petra
I love stencils. They are ever so versatile and make immediately a wonderful impact. For this card a StencilGirl stencil, distress inks, Perfect Pearls for the inky stripes, a lacey heart and a Mulberry flower was almost all that was needed
Michele
I used to be kind of afraid of stencils, as I was not sure how to use them effectively.  Through practice I'm learning that stencils can be used so many different ways.  I inked the Stencil Girl flower stencil with red ink over a piece of sheet music for "Ode to Joy."  The original plan was to make a bookmark but when the squared top seemed to boring I ended up turning this into an arch.  The cardboard base is covered with some designer paper and then I added the torn piece of sheet music with the stenciled flowers.  I used a circle die cut to round the top and embellished with some washi tape, the title of the song, a butterfly brad and some vintage images from a Lunagirl collage sheet called "Fly Away Home."
 
------------------------
 
   Stencil Girl  
 I am so pleased to have StenciGirl Products as my sponsor this time.  They carry an abundant supply of stencils in various sizes.  If you buy a number of stencils for your art work, you may want to look into their Stencil Club.  You are able to receive stencils through the club that are not sold on the general website.
 

Monday, October 7, 2013

"Tags" Challenge Continues

The "Tags" challenge is in its second week.  I have had some great entries so far. However, the Design Team is looking forward to seeing some additional entries.
Vicki
Since Lunagirl is sponsoring this Tag challenge on my blog and they have started a challenge on the Lunagirl Moonbeams blog themed "Lady Blue"  I have created a tag with the theme "Lady Blue"  I took two images from one of the  Lunagirl collage sheets  and used one of her beautiful blue backgrounds.  I made part of the background a little darker by doing a repeat printing of  a strip of the background.    I think the diecut is from Memory Box.  It is one a friend gave me to show what she had ordered recently.  It is a perfect compliment to the  small image.

Krisha
Here is my tag for this week featuring a lovely image from Lunagirl Digital Images .  I loved the regal look she has, I did remove the frame around her.  I printed her twice and did a stack of the bust of the woman with pop dots.  I also added Pearl-EX to the background and to her cheeks, sorry the photo doesn't show it well.  The stamped sentiment is from Hampton Arts and the gold embossed images are from Friskers.  This is all added to a large paint chip from Home Depot, and the color is Firecracker!  I bet she was at one time too.  Black lace, pearls and a ribbon were the finishing touches.
Michele
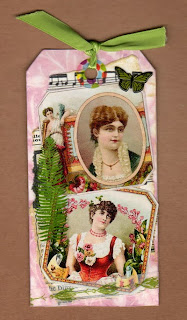
I've got two gorgeous vintage images from Lunagirl on this tag and the pink background is actually digital design paper created by Karen at Lunagirl and offered free on her blog.  I also used sheet music, and more tissue tape and stickers and a butterfly brad.  Tags are fun to make and I hope you will make one and link up to our challenge! 
Petra
For this tag I combined two wonderful images from Lunagirl, the lady and the frame. It looks as if they were made for each other! I layered them on patterned paper which I decorated with some stamping and German Scrap. To finish the tag I added a couple of half-pearls and a handmade tassel from embroidery thread.
Barbara
This week I did a larger tag with the Tim Holtz tag and book plate big z die. edged with gold thin line border stickers by Dazzles. layered the images on gold glitter paper and the flowers with gold brads for centers.
Hazel
For this tag I used one of the Edwardian children pictures, digitally adding 'My sweetheart' and the phrase that says 'A rose speaks of love silently in a language known only to the heart.' The flowers around the tag are from my stash, as is the piece of sparkly netting used for the tie of the tag.

I created my tag using images from Lunagirl, the sponsor of this challenge. The picture was cut with a deckle edge scissors. Distress Ink sponged over a sequin negative and stick-on lace create extra texture on the background. Ribbon and a pearl add a final touch


Friday, October 4, 2013

Lunagirl Moonbeams are Showing off Autumn

Lunagirl Moonbeams are showing off autumn in their creations this week.  Karen of Lunagirl is giving away two prizes at the end of her challenge Sunday.  Below is one of my samples for the challenge.


I love this image of an owl.  You can see him trying to hide in the trees.  The background was actually a piece of striped cardstock.  I embossed it and then used two different distressed inks and highlighted the embossing.  I cut around the owl so he would become a part of the background.  The sentiment is made with tag alphabet stickers.